

When it comes to getting the perfect sound, compression is a difficult topic to get your head around at first, but it’s incredibly important to understand how it works and how to hear it. If you’re performing, recording, mixing music, or even recording voiceover for videos or podcasting, compression is a key tool that you’ll need to use.
So, what is compression, what do the controls do, and how do we dial in a compressor to achieve the sound we want? Read on; we’ll cover how to use a compressor on your recordings and more.
In a hurry?
- Threshold: Sets the level of volume at which signals activate the compressor
- Ratio: Sets the amount of volume reduction that occurs over the compressor’s threshold
- Attack Time: How quickly the compressor reacts to signals that exceed the threshold
- Release Time: How quickly the compressor stops reacting to signals once they go back under the threshold
- Knee: Sets the aggression of a compressor by deciding whether the threshold activates at an exact volume or a wider volume range.
- Makeup Gain: Adds volume back to your signal to compensate for the volume lost by compression
What is compression, and why should I use it?
Compression is a vital tool for controlling the overall volume of an audio signal. The best way to think about it, and my go-to way of explaining it, is simply that it makes the loudest parts of a sound quieter and the quietest parts of a sound louder. This is really important when it comes to recording or audio post-production, like mixing or mastering, in order to achieve a more balanced, even signal.
By catching the loudest part of a signal and reducing it in volume, we can prevent distortion and get punchier sounds. The initial hit of any sound is referred to as a transient, which is what compression often helps us to manage, as these can be a lot louder than the rest of the sound.
Now, we need to establish what a compressor fundamentally does: it turns the volume of signals that exceed a specific level back down to below that level. Due to the way it impacts sounds by making them more consistent and how it can make the relationship between multiple sounds more balanced, compression is often referred to as “glue”.
How to use a compressor
So, how do we effectively use a compressor? By learning what its controls do. This helps us to conceptualise compression, hear it as we use it, and feel less intimidated by all the weird names and dials that a compressor can have. It took me years to feel like I truly understood and could properly hear what I was really doing when changing settings on a compressor, but hopefully, this guide will make things a little bit easier.
Threshold
 Threshold is one of the most important first settings when dialling in a compressor. As we’ve mentioned, compression turns down signals that exceed a certain limit. A compressor’s threshold control is how we set that limit. Without a signal exceeding that limit, we won’t get any compression.
Usually measured in decibels, threshold settings can vary from -∞ dB to 0 dB. At -∞, everything will be compressed, at 0 dB, nothing will be. So, to dial in the level of compression we want initially, most threshold settings will start at 0 and let us shift it backwards to taste.
This lets us get as aggressive or subtle as we want and can be easily adjusted as we go for as much precision in our compression as we need.
To see if your threshold is set the way you want it to be, check the VU meter or LED display on the compressor, and watch how it moves in response to the sound you’re compressing. The further the meter moves, the more compression is being applied.
Ratio
The ratio determines the intensity of compression. We’ve established that compressors run down the volume of a signal that exceeds a specific level back down to below that level. But by how much does it turn it down? That’s what the ratio dictates.
So, let’s say, for example, you have a signal that exceeds the threshold you’ve set by 5 dB. With a ratio of 2:1, the compressor will turn it down by 10 dB. For every decibel the signal exceeds your threshold by, the compressor will reduce it by two. This is a much more subtle ratio, but some can go as far as 25:1, or even ∞:1! As such, the ratio can also determine how aggressive a compressor sounds.
At first, you’ll notice signals getting much quieter, but there’s another control that’ll balance this out.
Attack
The attack settings control how quickly the compressor applies gain reduction after the input signal passes the threshold. This is key to how a compressor handles transients.
Faster attack times will clamp down rapidly on transients, squashing them down quickly. Slower attack times will let more of the natural transient through, resulting in a punchy, dynamic sound. Getting the right attack is about balancing these two things.
Release
 Release dictates how quickly the compressor recovers from applying its gain reduction, letting go of the transient to let the rest of the signal pass. This can be used to maintain a gentle squeeze throughout a whole sound or to quickly clamp down on the uneven parts of the signal.
Faster release times will result in a quick and temporary gain reduction that recovers quickly.
People will often say the release time dictates how much character of the compressor comes through. Release being set too fast makes a sound unnatural, resulting in a “pumping” effect. Too slow a release means that the compressor won’t stop compressing, resulting in a flat sound.
With attack, we talked a lot about transients. But to get release right, think about the parts of a sound that sustain, and listen to them closely as you adjust it.
Makeup Gain
Since compression makes a sound quieter, and before compression we’ve probably already dialled in how loud we want the sound to be overall, makeup gain helps us compensate by boosting the output signal back to its original level.
Since we’ve reduced the loudest peaks of the sound, the rest of the overall signal can feel quieter than we initially thought or want it to be after compression. So, we use makeup gain to return it to its original levels.
Sometimes, we get control over the input signal level, determining how hard we push the signal into the compressor on the way in, and a separate output level control. Sometimes we just get one of these and the other one’s set automatically. Many digital compression plugins give us an automatic make-up setting, which will immediately get us to the level we were previously at.
Use the levels shown by the meters on the compressor to inform you on what level to set this at, or you can always push the makeup gain harder.
Get started with compression
Now that you’ve pulled up your compressor of choice and are looking to tweak a sound, where and how should you start? Compression can go either before or after EQ, depending on what you’re trying to accomplish with it. I usually recommend using EQ both before and after as EQ changes how compressors react to a sound.
EQing before compression is a good way of removing the information you don’t want the compressor to bring up, but it’s good to also have a way of correcting things if you notice new issues after compression.
I’d recommend beginning with a ratio of about 4:1 as a very middle-of-the-road ratio. From here, set the attack to something fast-to-medium speed. This should let some of the initial crack of the transient through, without being too dynamic that it’s loud or harsh. Set your release to a medium speed, something right down the middle should help you decide which way you want to adjust it later.
Now, slowly bring your threshold back from 0 until you start getting some compression. Try to get the gain reduction meter to around 4 – 6 dB of gain. Once again, a moderate but noticeable setting, and usually about as much as you’ll need. Then, adjust the makeup gain to wherever you have the gain reduction, or use the compressor’s auto-gain feature to get the perfect balance.
Here’s where you need to start making your decisions. Too much transient? Speed up the attack. Not enough transient? Slow it down! If you’re noticing audible pumping, it may be worth slowing down the release time. If the ratio feels too aggressive, back it off to taste, or maybe consider softening the knee if you have control over it.
If you want to compress more of the signal, decrease the threshold. Similarly, if you’re feeling like it’s too much, back off that threshold to compress less. Then, adjust your makeup gain to hit your target levels if your amount of gain reduction has changed from your tweaks.
Remember, you can also set your makeup gain to make the sound louder or quieter than it was before compression if you want to change where it sits in the mix. This is fine to do so long as you know that you’re doing it and why!
Things to consider when using a compressor
Compression brings up aspects of the sound you might not have noticed before. Breath sounds in a vocal, fret buzz on guitar or bass strings, amp noise from a guitar cabinet, bleed in drum mics, noise in samples… if you’re noticing things you don’t like in your recording jumping out suddenly, it might be a sign that you’re compressing too much.
Try backing off the threshold to fix this. You can also try correcting it with EQ, but this might not always work as intended.
The main question is, does your recording sound better because of the compressor? Try bypassing it and switching it back in, and see what you prefer. Some sources, like electric guitar or samples and loops, might not need more compression as it’s likely they’re already getting some.
If you’re working on a mix, is the sound already compressed? Many engineers will already compress things like vocals and bass whilst recording, and compressing them further can make a song feel flat and lifeless, pushing a track into overcompression. Some things might just need a lighter touch, and some might not need any at all.
For percussive sounds, especially things like shakers or drums, be wary of your attack times. Percussion relies on the transient to cut through a mix, and if you squash this too hard it can really flatten your drums.
And don’t be afraid to get aggressive with the threshold! For short, snappy sounds like these, a slower attack, and a medium-to-fast release may be better. Especially with dense tracks, catching a lot of your drums with the compressor can help them punch through the mix.
Compression techniques
There are three major styles of compression that can really bring your sound to life.
Serial compression uses multiple stages of compression to get a colourful and controlled sound. This is often used with vocals to get a nice upfront sound that sits on top of a mix. Try chaining a FET-style compressor with fairly fast settings and a high threshold that catches only the fast, big peaks on a vocal into a smooth optical-style compressor to bring out the body of the vocal.
It’s also good for subtle compression, letting you set multiple compressors doing much less. If you want transparent compression, serial compression chains are the way to go.
Parallel compression is a good way to make something punchy without being over-the-top. Some compressors will have a built-in wet/dry blend control to do this. For others, you might need to set up on a bus or a separate track.
To get good parallel compression, try some really extreme settings – fast attack, fast release, high ratio, hard knee, and a really low threshold – to smash a signal. Then, blend this slightly with the original track and it’ll bring out a lot of extra definition. This is excellent on drums and is also extremely good on distorted guitars or metal vocals – especially if you throw a bit of saturation for more character!
Sidechain compression allows you to create manual ducking of signals. Particularly in busy mixes, sidechain controls will allow you to carve out space for other sounds. It can also be used for creative effects.
Sidechain ducks a signal when the intended sidechain input is triggered. For example, you could duck the bass guitar when a kick drum hits, or duck guitars to make space for snares or vocals. You can also use this on reverbs, ducking a reverb send on a vocal when the main vocal comes back in for a naturally shifting echo.
Our favourite compressors
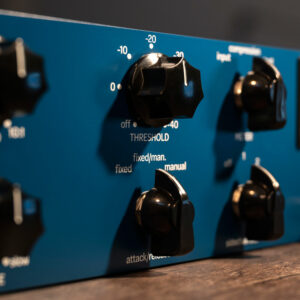
Warm Audio WA-1B
 The Warm Audio WA-1B is a tube-based optical compressor that takes inspiration from a classic Scandinavian analog design.
It’s full of personality thanks to its tube-based circuitry, providing a warm and smooth personality that complements its generally slower, less aggressive attack and release times.
Perfect on vocals, bass, acoustic guitar, and piano, the WA-1B is a great way of warming up sources.
But make no mistake, with its input and output transformers, up to 10:1 ratio, and vacuum tubes, it can also get aggressive.
Setting the WA-1B apart is its variable controls; these let you either manually set attack and release, use a default setting that reflects its famed smoothness, or a combined setting, blending its default with your custom settings for a serial compression effect in a single unit.
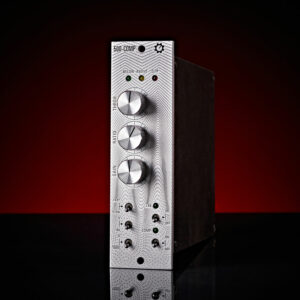
G4M 500 Series Compressor
 The G4M 500 Series Compressor is a compact and transparent compressor that’s ideal for those just starting with outboard gear.
Fitting into the compact 500 series format, this compressor doesn’t have the same extensive controls as some larger units but still offers everything most people need to get functional compression quickly.
Its variable ratio lets you go from a subtle 1:1 to a staggeringly aggressive 25:1, making it great for parallel compression, too.
Its attack and release controls are fixed, but switchable between fast and slow modes to instantly dial in the flavour you want.
Constantly variable gain and threshold controls make it responsive and easy to set up.
Plus, a built-in high-pass filter at 100 Hz can cut out the low-end information from the compression, keeping your signal clean.
Baby Audio Parallel Aggressor
 The Baby Audio Parallel Aggressor is a digital parallel compression plugin with two channels.
Modelling its sound on a variety of classic analog units, the Parallel Aggressor captures the specific and sought-after sound of New York studios throughout the 1990s.
Instantly parallel, this plugin allows you to adjust the level of two compression styles as well as a dry signal to taste.
Parallel Aggressor’s Heat engine adds saturation, whilst the Spank engine adds an aggressive compression algorithm.
Its minimal interface and effective pre-dialled sound let you get the effect you want quickly and easily, with an output control or auto-gain feature to maintain your original balance.
FabFilter Pro-C 2
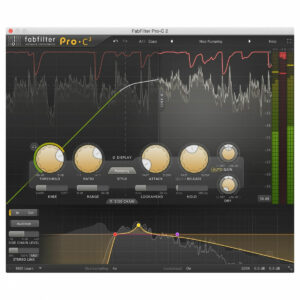 FabFilter’s Pro-C 2 is an incredibly versatile compression plugin with eight different styles and expansive controls.
It also boasts flexible routing to achieve any compression effect you want.
Taking full advantage of the flexibility of digital plugins, Pro-C 2 offers full control over threshold, ratio, attack, release, makeup gain, wet/dry mix, knee, range, lookahead, and hold for heavily customised compression.
Pro-C 2 can be operated in mono, stereo, or mid-side processing, making it great for unique and creative processing across any level of music production.
From sound design to mixing and mastering, Pro-C 2 is one of the most flexible compressors available.
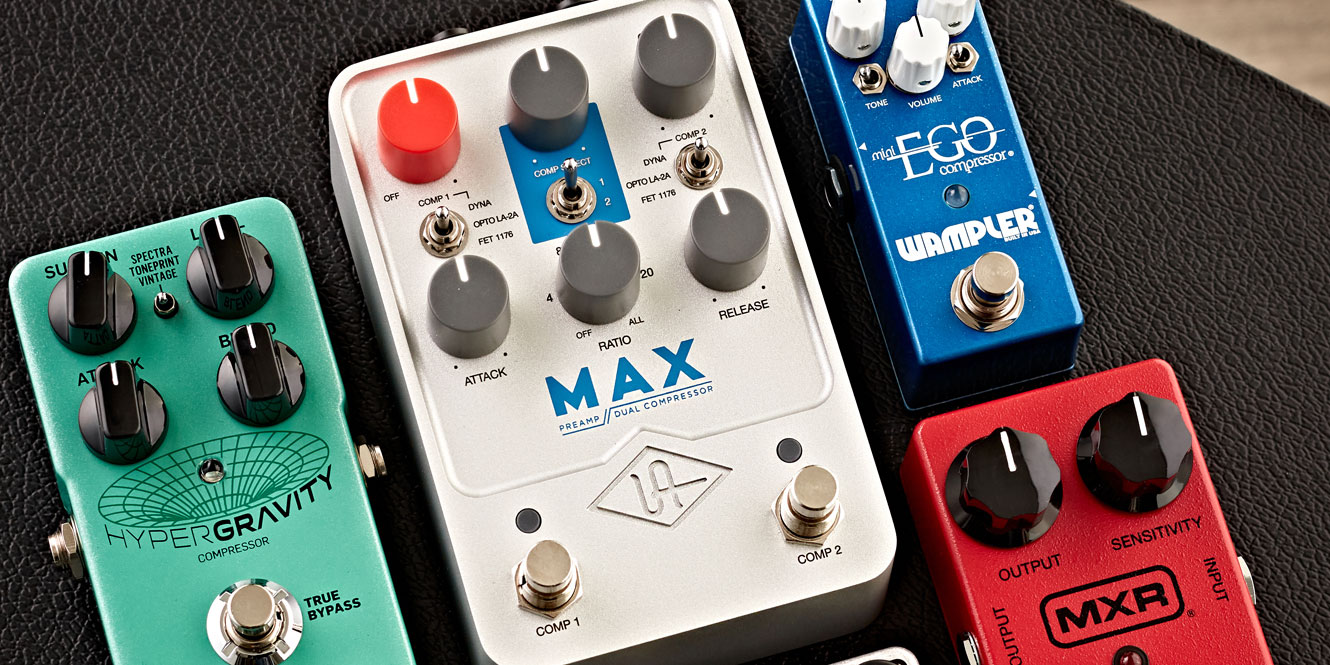
Universal Audio UAFX Max Preamp and Dual Compressor
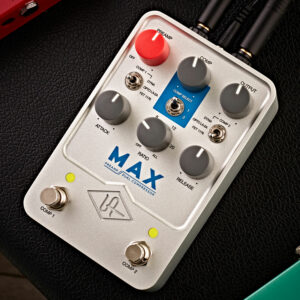 The Universal Audio Max is a preamp and dual compressor pedal that’s ideal for both live and studio use.
Aimed at guitarists and bassists, this pedal is well-suited to far more than meets the eye, as guitar pedals can also serve as a budget-friendly outboard for mixing in a studio space in a pinch!
With a colourful preamp emulation inspired by UA’s own 610 preamp, as well as two distinct compressor stages, this pedal can carry out serial compression or stereo processing.
Its three compressor models emulate the classic Dyna Comp pedal, LA-2A, and 1176 from Universal Audio themselves. Full control over attack, release, and ratio makes it flexible and easy to use. It’s also equipped with wireless control from a UAFX Control app for smartphones and tablets to store and load presets.
If you want to glue a guitar or bass tone with a full band, or even fully process signals straight from your DAW, the UAFX Max is built to do it all.
MXR M102 Dyna Comp
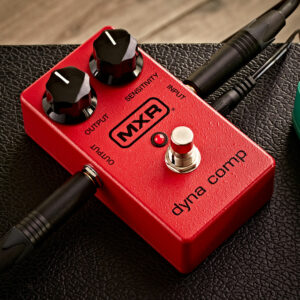 The MXR M102 Dyna Comp is a famed guitar compression pedal.
In fact, it’s most well-known for its frequent use by David Gilmour.
Its minimal interface is simple and easy to use, giving guitars a snappy attack and increased sustain that can really jump out of a mix or through PA speakers live.
A great way to simplify achieving a more even and balanced guitar sound, the Dyna Comp sounds sharp and punchy, making it great for distorted rhythm tracks and guitar solos.
FAQs
How should I use a compressor?
You should use a compressor to ensure a track is consistent in volume, making loud parts quieter and quiet parts louder. This can help balance sounds against each other for a smoother sound. Adjusting the threshold is important for this, letting us catch peaks without squashing too much.
What are the 5 basic controls of a compressor?
The 5 main controls on a compressor are:
- Threshold
- Ratio
- Attack
- Release
- Makeup Gain
Should I use a compressor on everything?
No, not everything needs to be compressed. Compression is a tool that can make things sound better, but using it too much can ruin the dynamics of your mix. Just ask yourself if the sound needs to be more even in volume before you apply compression.
How do you know if something is overcompressed?
A sound is overcompressed if the volume is constant the whole way through. If quieter or less busy parts of a song are as loud as the busy, louder parts, you’ve used too much compression. Often, it’ll feel flat and hard to listen to, making your ears fatigued quickly.
Find out more
That was a lot of compression talk for one blog post – but I hope this article has helped you grasp compression a bit better. Whether you’re working with a plugin, pedal, or outboard gear, knowing what the different parameters do is crucial to understanding how a compressor works.
If you’re looking to buy a compressor pedal specifically, why not take a look at our favourite compressor pedals of this year? Or if you’re now wondering how to control the preamp in your studio, have a read of our handy guide.
Do you have any more tips? Let us know in the comments below!


0 Comments