

Setting up a drum kit can be daunting for beginners, but with some guidance, you’ll soon find it pretty straightforward! In this article, we’ll teach you how to set up a drum kit, ensuring everything is within comfortable reach and easy to play.
A drum kit typically comprises three main parts: drums, hardware, and cymbals. The aim when setting these parts up is to ensure you have maximum fluidity around the kit, making your drumming experience much more enjoyable.
In a hurry?
Here’s a quick rundown of how to set up your drum kit:
1. Choose a location
2. Lay down a rug
3. Assemble the bass drum
4. Install the bass drum pedal
5. Set up the snare drum
6. Position the tom-toms
7. Arrange the floor tom
8. Set up the hi-hat stand
9. Situate the cymbal stands
10. Mount the cymbals
11. Adjust the drum throne
12. Fine-tune the setup
13. Check hardware stability
14. Test and play

A 5-piece drum setup
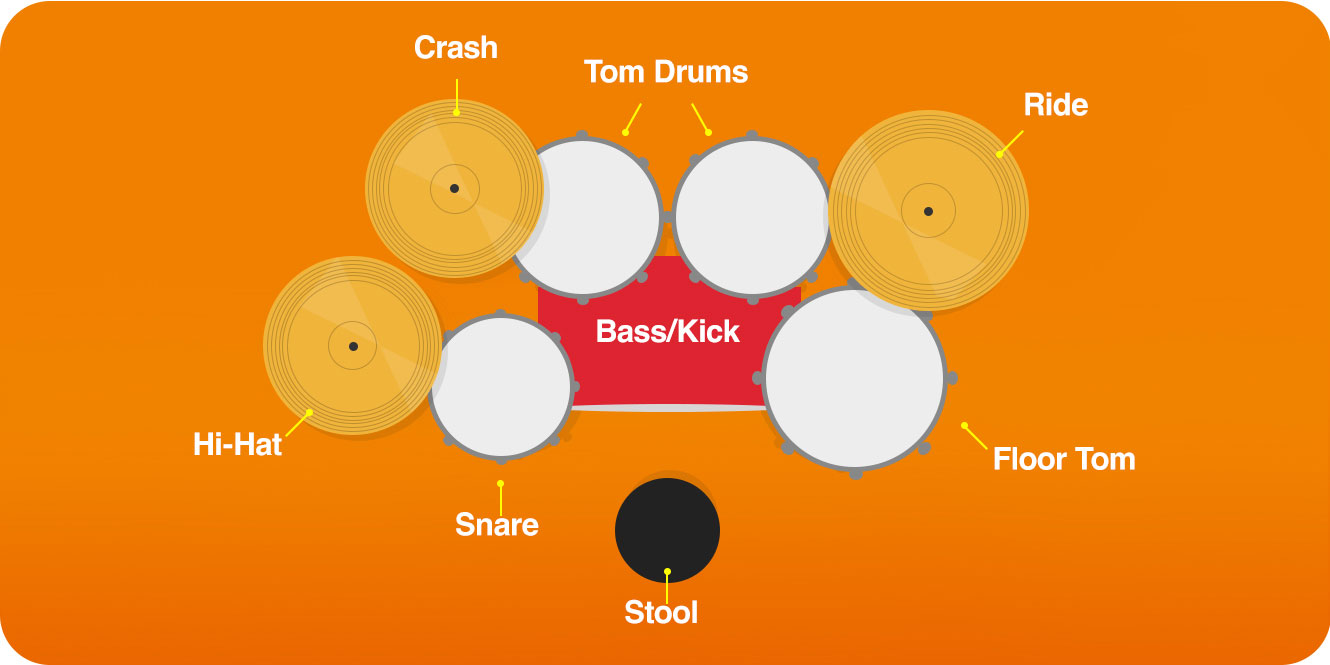
How to set up a drum kit
1. Set up the bass drum
Start by setting up the adjustable legs equally; the angle of the legs should point towards the bottom of the resonant hoop. Place the bass drum on the floor and slide a book under the front of the resonant hoop so that the drum hoop is resting on it. Next, loosen the leg extensions until they touch the floor and then tighten them securely. Once the legs are stable, remove the book.
This method allows the bass drum to resonate freely, ensuring optimal sound quality. It also ensures the beater from the pedal will strike the drum at the correct angle, providing the best response and feel when playing. Proper setup of the bass drum is crucial for both the sound, playability, and durability of your drum kit.
2. Attach your bass drum pedal
Begin by attaching the toe clamp to the batter side of the bass drum hoop, ensuring the pedal remains flat and does not lift on either side as you tighten the clamp. Adjust the lateral position of the pedal on the hoop if necessary to achieve a flat and secure fit.
If you’re worried about damaging the hoop when clamping, opt for a hoop protector such as the Drum N Base HP180 Bass Drum Hoop Protector to keep the hoop in perfect condition.
Next, adjust the beater height so that it strikes the centre of the drum. This ensures optimal sound and response. If your pedal has spike screws, use them to prevent the bass drum from creeping forward during play.
Spring tension and beater angle are personal preferences, so experiment with these adjustments to find a sound and feedback that suits you. For double kick pedals, the spring tension for each pedal may need to differ due to the connection of the slave pedal. To calibrate, pull back both beaters together and release simultaneously.
The swinging motion should match. If the slave pedal swings faster, loosen the spring tension. If it swings slower, increase the tension.
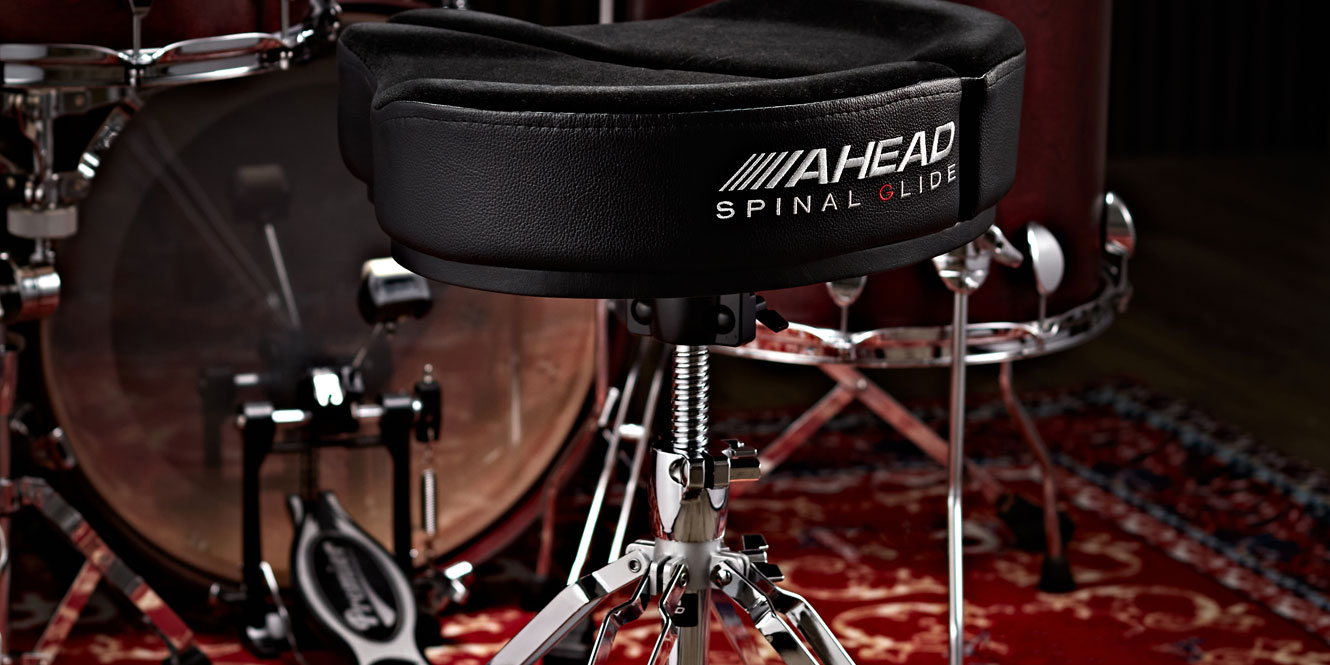
3. Adjust your drum throne
This is a small step – but very important! You’ll know your drum throne is at the correct height when your feet are flat on the floor with your hips slightly above your knees. Your knees should form a right angle.
Pull the throne up to the bass drum pedal. When your foot is on the pedal, your lower leg should be vertical. This positioning helps maintain good posture and ensures comfort during extended playing sessions. Proper throne adjustment is crucial for preventing fatigue and allowing you to perform with ease.
4. Arrange your snare drum
Adjusting the height of your snare drum correctly is essential. Position the snare drum between your legs and set the height a few inches above your legs. Ensure it’s at a comfortable height for striking with either hand without hitting the drum’s rim, while still allowing access to play rimshots.
If you tour or gig frequently, the Gibraltar 1″ Hinged Memory Lock is the ideal accessory for keeping your snare stand or any other stand at the same height show after show.
The snare throw-off is typically positioned to the left of the drum (right for left-handed drummers). This allows you to maintain a beat between the hi-hat and snare with your dominant hand while being able to disengage the snare wires on the fly.
Most drummers keep their snares flat, but players using traditional sticking might prefer to angle their drums slightly downwards and away from them. Proper positioning ensures comfort and accessibility, enhancing your overall playing experience.
Make sure your snare drum is secured in the basket of your snare stand – this will keep it stable and protect the hardware and shell. Be sure to avoid overtightening to allow the snare drum to resonate freely.
5. Set up your tom drums
A typical kit has three tom drums: two rack toms and a floor tom. Many bass drums have a port drilled into the top to accommodate a tom mount from which you hang the two rack toms. These often come with a lot of height and angle adjustability to ensure they’re exactly where you need them. If your kick drum lacks a tom mount, you can attach the toms to cymbal stands using clamps, or place a single tom on a snare stand.
As for the floor tom, that is arguably the easiest drum on the kit to set up. They come with three legs to attach to the shell, which you can adjust to the correct height for you and your kit. Ideally, the floor tom should be slightly lower than the snare drum – this is going to enhance your kit fluidity for those quick fills.
The Premier Artist 22″ 5pc Shell Pack features a drilled bass drum and a tom mount that supports both toms – making it easy to adjust the height and angle of them individually as well as simultaneously.
6. Position your hi-hat stand
Up next is your hi-hat stand. Ensure both the footplate and all the legs are firmly touching the floor – this is going to maximise stability for getting the most from your hi-hats.
Place the hi-hat stand to the left of the snare drum (right for left-handed drummers). Adjust the height so that the top cymbal is at a comfortable level for playing with both your hands and feet. Make sure the cymbals are close enough to each other to produce a crisp sound when the pedal is pressed but not so close that they can’t vibrate freely when open.
As you progress through your drumming career, you’ll find a level of hi-hat cymbal positioning that suits you.
The Pearl 830 Series Drum Hardware Set is an easy-to-use set that includes everything you need to arrange your kit properly. Double-braced legs and plenty of height adjustability make this hardware set one of the best on the market.
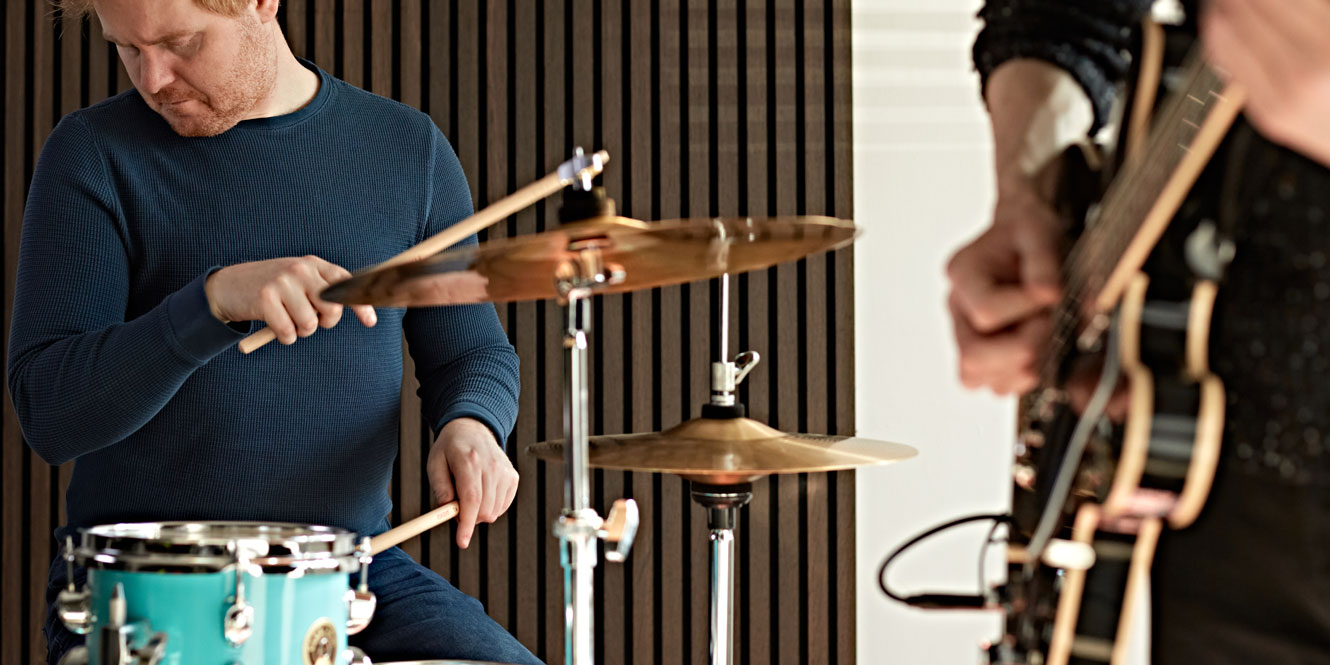
7. Set up your cymbals
The main cymbals in a drum kit are the hi-hats, crash cymbal, and ride cymbal (which is typically placed to the right of the kick drum or floor tom). Ensure the cymbals are set at a height comfortable for you, avoiding any need to stretch or bend your back to reach them.
The Sabian Stratus Promotional Set is versatile for a huge range of genres. Each cymbal is straightforward to set up yet extremely effective on stage and in recordings.
While some drummers prefer to position their cymbals flat, angling them slightly towards you can help prevent the cracking of sticks or cymbals as this sends the shock all the way through the cymbal. This slight angle also makes it easier to strike the cymbals cleanly.
Top tip: Rotate your cymbals so that you’re not always playing in the same spot all the time to also prevent them from splitting or cracking.
Where should I set up my drum kit?
Choose a space large enough to easily adjust and position all parts of your kit. You should also consider the type of floor you will set up on. A carpet is ideal, but if you have a smooth, solid floor, use a drum rug such as the Drum n Base Vintage Persian Drum Mat to prevent your drums from sliding, and to absorb some noise.
If you frequently set up and break down your drum kit, consider using mat markers such as the Protection Racket Drum Mat Marker Pack. These will help you locate the exact positions of your drums and hardware, ensuring a consistent setup every time. Proper setup space enhances comfort and stability while playing.

How to sit at a drum kit
Proper posture is essential for a long-lasting and healthy drumming career. First, ensure your back is straight while sitting at the drum kit. You should then check that your legs are bent at a 90-110-degree angle, with your feet flat on the floor. Keep your arms relaxed to prevent strain.
Some drum thrones come with a backrest like the Gibraltar 9000 Series Throne, which supports proper posture, making them ideal for endurance drumming. Maintaining good posture helps prevent fatigue and injuries, allowing you to play comfortably for longer periods. It’s crucial for both performance and long-term health.
How to hold your drumsticks
Although it seems self-explanatory, there are two main ways to hold drumsticks: traditional grip and matched grip. Other variations include French grip, German grip, and American grip.
Traditional grip: This is often used in jazz and marching band settings. Hold the left stick between your thumb and index finger, letting it rest on the ring finger. The right stick is held similarly to the matched grip.
Matched grip: This is more common in rock and modern drumming. Both sticks are held the same way, with the thumb and index finger forming a fulcrum and the other fingers wrapped around the stick.
French grip: Thumbs are on top of the sticks, with palms facing each other. This grip is excellent for finesse and speed, particularly in cymbal work.
German grip: Palms face down, with a larger range of motion from the wrists. This grip provides power and is commonly used for snare drum playing.
American grip: A hybrid between French and German grips, with palms at a 45-degree angle. This grip offers a balance of power and control, making it versatile for various styles.

FAQs
How should a drum kit be set up?
A drum kit should be set up for optimal playability and comfort. Position the bass drum centrally with the snare drum directly in front of you. Place the hi-hat to the left, and arrange the toms and cymbals within easy reach, ensuring all components are securely mounted.
What is the standard configuration of a drum kit?
The standard configuration of a drum kit includes a bass drum, a snare drum, a hi-hat, two toms, and a floor tom. This setup gives you full scope to achieve full kit playability. Cymbals such as a pair of hi-hats, a crash and a ride are typically included to complete the kit’s full range of sounds.
How do I set up a drum kit for a beginner?
Setting up a drum kit for beginners involves arranging the components in an ergonomic and accessible manner. Start with the bass drum and attach the pedal. Position the snare drum between your legs and adjust the height. Mount the toms, set up the cymbals, and ensure everything is comfortably within reach.
Final thoughts
Above all else, comfort is key when it comes to setting up a drum kit. Make sure everything is set up within an easy reaching distance without having to fully extend your arms or legs.
We hope our guide has taught you how to set up a drum kit with all the details and key pieces of information you need! Remember, every drummer is unique, so don’t hesitate to experiment with different setups to find the very best for you. This personalised approach will help you play more effectively and develop a unique sound.


0 Comments